Introduction
Windows 10 offers the convenience of creating a guest account for temporary users. This feature can be handy when you want to share your computer with friends or family, ensuring they have their own space without interfering with your personal files and settings. In this article, we will guide you through the process of giving someone access to your guest account on Windows 10.
2. Why Share Your Windows 10 Guest Account?
Sharing your Windows 10 guest account has several advantages. It allows you to maintain privacy and security while granting access to your computer for specific purposes. Whether it’s for a quick web browsing session or a simple document task, a guest account can be a valuable tool for controlled access.
3. How to Give Someone Access to Your Guest Account
Create a Guest Account
Before you can share access, you need to have a guest account set up on your Windows 10 computer. Here’s how:

- Press the Windows key and open “Settings.”
- Click on “Accounts.”
- Select “Family & other users.”
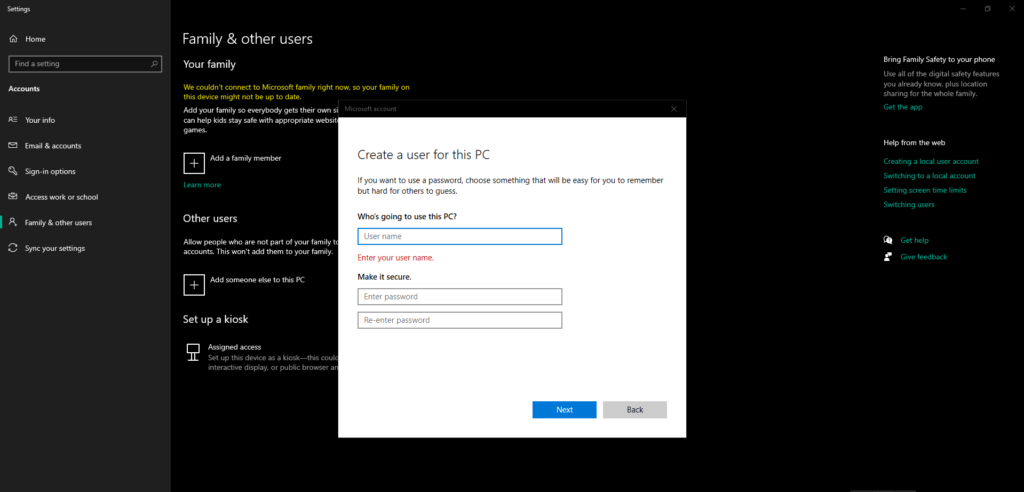
- Under “Other users,” click on “Add someone else to this PC.”
- Follow the prompts to create a new account. Be sure to set it as a “Standard User.”
Enable Guest Account
After creating the guest account, you need to enable it. Here’s the procedure:
- Press the Windows key and open “Settings.”
- Click on “Accounts.”
- Select “Family & other users.”
- Under “Other users,” you will see the newly created account. Click on it.
- Click “Change account type” and set it to “Guest.”
Sharing the Password
Once the guest account is enabled, you’ll need to share the password with the person you want to grant access to. Make sure to do this securely, preferably in person, or through a secure communication method to maintain your computer’s security.
Limited Access
By default, a Windows 10 guest account provides limited access. The user can’t install software, make system changes, or access your personal files. This ensures your privacy and system integrity.
4. Precautions to Consider
When giving someone access to your guest account, it’s essential to consider a few precautions:
- Password Security: Ensure the guest account password is strong and not easily guessable.
- Regular Check-Ins: Keep an eye on the guest account’s activity to ensure it’s not misused.
- Log Out After Use: Remind the guest user to log out of the account after they’ve finished their task.
Conclusion
Sharing your Windows 10 guest account can be a convenient way to provide controlled access to your computer. By following the steps outlined in this article, you can create a guest account, enable it, and share access securely. Remember to take precautions to safeguard your system and personal data.
FAQs
1. Can I give access to my guest account without creating one first?
No, you must create a guest account before sharing access. This is to ensure that you have control over who uses your computer.
2. What can a guest account user do on my computer?
A guest account user can perform basic tasks like web browsing and using pre-installed software. They cannot make system changes or access your personal files.
3. Is it safe to share the guest account password?
It’s safe to share the password if done securely. Ensure it’s shared through a trusted method to prevent unauthorized access.
4. How do I disable the guest account when it’s no longer needed?
You can disable the guest account by following the steps to “Enable Guest Account” and selecting “Remove.”
5. Can I give someone access to my guest account remotely?
It’s best to share the guest account password in person or through a secure communication method to maintain security.
In this article, we’ve walked you through the process of giving someone access to your guest account on Windows 10. By following these steps and taking necessary precautions, you can ensure controlled access while safeguarding your privacy and data.


